If you’ve ever looked at a forex chart and wondered why the price keeps bouncing from certain areas, you’re not alone.
Those areas — where price reacts again and again — are what professional traders call Supply and Demand Zones.
Learn the Secret of Forex Trading, Click here to download a free e-book now
Understanding these zones can completely change the way you see the market. They show you where the big banks and institutions are placing their orders. And if you learn how to identify and trade them properly, you can start catching trades that align with the smart money — not against it.
In this guide, I’ll break down everything you need to know about supply and demand zones, how to spot them, and how to use them to make consistent profits.
Key Summary
- Supply and Demand zones show you where banks and big players place their orders.
- Always wait for confirmation before entering a trade.
- Focus on fresh zones and align with the market trend.
- Combine with price action and structure for the best results.
- Practice on demo before risking real money.
What Are Supply and Demand Zones?
Let’s start simple.
- Supply Zone: An area where sellers are likely to step into the market and push prices down.
Think of it as a wholesale warehouse filled with sell orders waiting to be triggered. - Demand Zone: An area where buyers are likely to step in and push prices up.
Think of it as a supermarket packed with buy orders ready to lift price higher.
When the price reaches these zones, it reacts — either by bouncing or reversing completely.
And that reaction creates your trading opportunity.
How Supply and Demand Work in Forex
Price in forex moves because of imbalances between buyers and sellers.
When demand outweighs supply, prices go up.
When supply outweighs demand, prices go down.
Here’s the secret:
Institutions — the big money movers — can’t place all their orders at once.
They build their positions in chunks, often leaving behind footprints on the chart — and those footprints are the zones we trade. So every time price returns to those footprints, there’s a high chance that the remaining institutional orders will react again.
How to Identify Supply and Demand Zones on a Chart
To find valid zones, you need to look for strong movements that started from a base.
Here’s the simple step-by-step process:
1. Look for an Explosive Move
Find a sharp rally (up) or sharp drop (down) on the chart.
Those strong moves are the result of heavy institutional activity.
2. Identify the Base
Before the strong move, price usually paused or consolidated briefly — that’s the zone.
Mark the highest and lowest candle of that base before the breakout.
3. Mark the Zone
Draw a rectangle from the start to the end of the base.
That area becomes your demand (if price moved up) or supply (if price moved down) zone.
4. Wait for Price to Return
Don’t rush to trade. The most profitable trades come when the price returns to that zone after the first breakout. When price retests the zone and shows signs of rejection (e.g., pin bar, engulfing candle, or break of structure), that’s your entry signal.
Example of Supply and Demand Setup
Let’s use an example.
If EUR/USD rallies strongly from 1.0600 to 1.0750 after consolidating for a while.
That area around 1.0600 – 1.0620 becomes your demand zone.
If price later drops back to that zone, you wait for a bullish reaction — maybe a strong engulfing candle — then enter a buy trade.
Stop loss goes just below the zone.
Take profit targets the next area of imbalance or the previous high.
Simple, clean, and effective.
Tips to Refine Your Supply and Demand Trading
Here are a few pro-level tips that separate winning traders from the rest:
1. Focus on Fresh Zones
The fresher the zone, the stronger it is.
If price has already touched a zone multiple times, the orders there are likely consumed.
2. Trade with the Trend
Align your zones with the overall market direction.
For example, in an uptrend, focus more on demand zones; in a downtrend, focus on supply zones.
3. Combine with Market Structure
Supply and Demand work best when combined with structure breaks and liquidity sweeps.
Watch how price behaves before entering the zone — if it grabs liquidity first, your setup becomes more valid.
4. Use Multi-Timeframe Analysis
Mark your zones from higher timeframes (H4, Daily) and use lower timeframes (M15, M5) for entries.
This helps you trade with precision while keeping your risk small.
Common Mistakes Traders Make
- Drawing too many zones – Focus on quality, not quantity.
- Trading every touch – Not all retests are valid. Wait for confirmation.
- Ignoring trend direction – Fighting the trend will hurt your win rate.
- Placing stops too tight – Give the market room to breathe.
How to Trade Supply and Demand Like the Pros
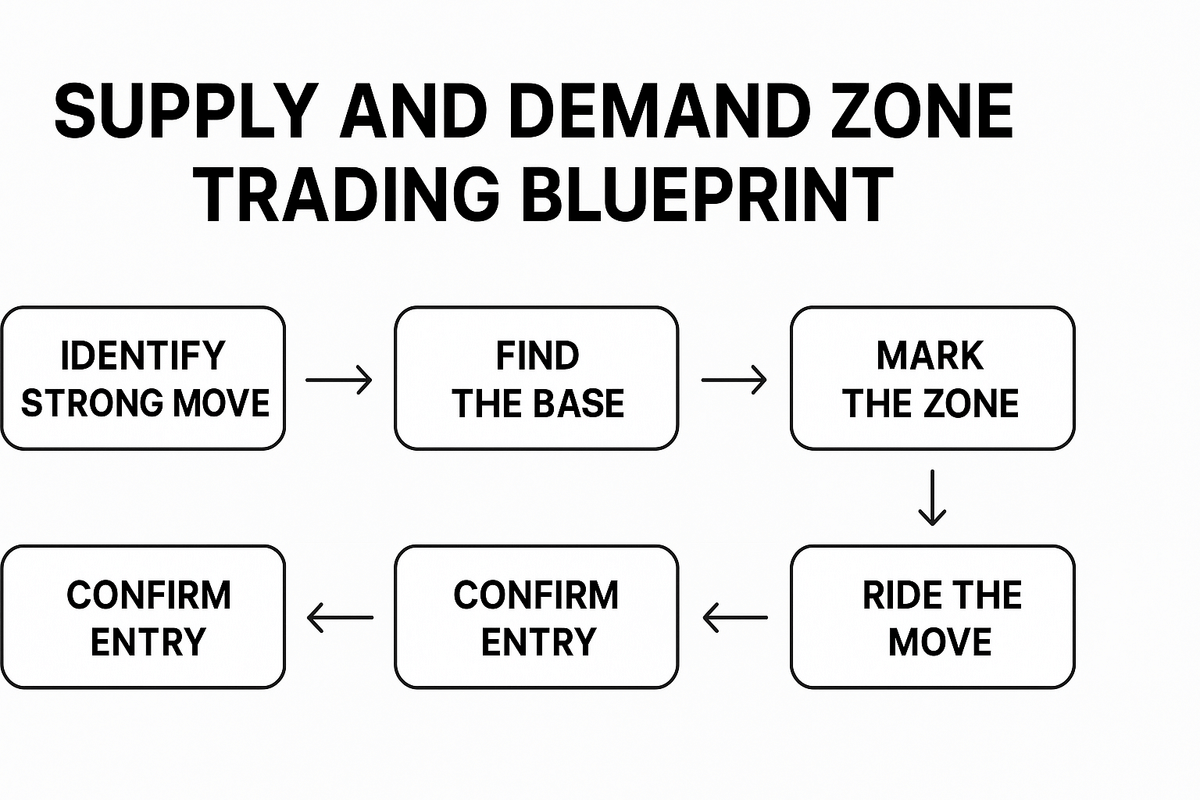
Let’s summarize the perfect setup:
- Identify a strong move (rally or drop).
- Mark the base (the last consolidation).
- Wait for price to return to that zone.
- Confirm with price action (engulfing, pin bar, or break of structure).
- Place stop loss beyond the zone.
- Aim for 2R–4R or more.
Over time, this method gives you high probability entries with tight stops and big rewards.
Bonus Tip: Combine It with Smart Money Concepts
If you’ve been studying Smart Money Concepts (SMC), you’ll notice that supply and demand zones are the foundation of institutional trading.
- Supply Zone = Institutional Sell Zone
- Demand Zone = Institutional Buy Zone
When combined with liquidity grabs and market structure breaks, this method becomes incredibly powerful.
For example:
- Wait for a liquidity sweep above a previous high.
- Then, look for a nearby supply zone for entry confirmation.
That’s how smart money trades.
Bottom Line
Trading with Supply and Demand zones isn’t about predicting — it’s about reacting to what the market has already shown you.
Once you learn to read these zones properly, you’ll start trading with confidence and consistency. So, the next time you open your chart, forget about indicators for a moment. Look for those clean impulsive moves, mark your zones, and trade with patience.
Because in forex, profit is not about how often you trade — it’s about how well you read price.